


Avoid Snapped Extractors: 5 Step Screw Extractor Routine and Kit Picks
The standard fix for a stripped or broken screw is a five-step routine: center punch the screw, drill a pilot hole, insert a reverse-thread extractor, turn it counterclockwise, and pull the fastener out. It works best on mild and medium steel screws; skip it on hardened, high-tensile bolts, which tend to snap extractors rather than yield to them.
TL;DR:
- Screw extractors work best on mild to medium steel screws and are likely to snap when used on hardened high-tensile bolts rated Class 8.8 or above.
- Using the correct extractor type, such as straight-flute for tougher steel or multi-spline for heavy-duty fasteners, improves success rates and prevents tool breakage.
- Proper preparation, including cleaning, soaking in penetrating oil, and precise center punching, significantly increases the chance of a clean extraction and minimizes surrounding material damage.
- Steady, manual turning with a tap wrench is essential to avoid snapping extractors, especially when applying counterclockwise force to the screw.
- If an extractor snaps or can’t grip, alternative methods like welding a nut onto the stub or using EDM machining are safer options than forcing further.
Table of Contents
- How Does a Screw Extractor Work?
- Which Extractor Type Should You Use?
- How Do You Prepare a Screw for Extraction?
- Step-by-Step: How to Extract a Broken Screw
- What Do You Do When the Extractor Won’t Bite?
- What Happens When an Extractor Snaps Inside the Screw?
- How Do You Choose and Maintain an Extractor Kit?
- Who Wrote This Guide?
- How Do You Loosen a Stripped or Rusted Screw First?
- How Do You Protect Surrounding Material During Extraction?
- What Are the Alternatives to a Screw Extractor?
- The Real Lesson Behind Extractor Failures
- Where to Get the Right Tools for This Job
- Sources
- FAQ
How Does a Screw Extractor Work?
A screw extractor uses a reverse thread, cut left-handed, so turning it counterclockwise both bites deeper into the pilot hole and unscrews the fastener at the same time. That’s the entire trick. You’re not prying or grinding; you’re threading a tapered, hardened tool into a hole slightly smaller than the screw shank and letting the wedging action do the work.
Extractors fall into two broad families. Internal extractors go inside a drilled pilot hole in the screw’s center, the method covered throughout this guide. External extractors, including socket-style grabbers, clamp around the outside of a screw head or stub that still protrudes, which matters when there’s nothing left to drill into cleanly. Left-hand drill bits sit in between: sometimes the reverse spin alone catches the fastener’s threads and spins it out before you ever need an actual extractor.
Material hardness sets the ceiling on what any extractor can do. A few points worth knowing before you start:
- The extractor has to be harder than the screw. If it isn’t, it deforms instead of biting.
- Standard spiral extractors are built for mild and medium carbon steel, not case-hardened fasteners.
- High-tensile bolts rated Class 8.8 or above frequently snap standard spiral extractors, which is the single most common failure homeowners run into.
- Rust and corrosion don’t make a screw harder, but they do add resistance that mimics a harder material’s behavior.
Which Extractor Type Should You Use?
Picking the right extractor family matters more than technique once you know the basic motion. Get the type wrong for the screw’s condition and you’re fighting the tool as much as the fastener.
Spiral extractors (often called Easy-Out style) work well on softer metals like brass, aluminum, and mild steel screws. Their tapered spiral flutes wedge into the pilot hole and grip hard, but that same wedging action can expand a broken stub outward, jamming it tighter against surrounding threads. On firmer steels, that expansion turns into a stuck extractor and a snapped tip.
Straight or square-fluted extractors cut a cleaner path with far less expansion, which makes them the better call on firmer steel screws or anywhere you can’t afford to swell the stub inside a threaded hole, like an engine block or an aluminum casting. Spiral extractors wedge and expand the broken stub, while straight-flute and multi-spline designs reduce that expansion, which is why professionals favor them on tougher material.
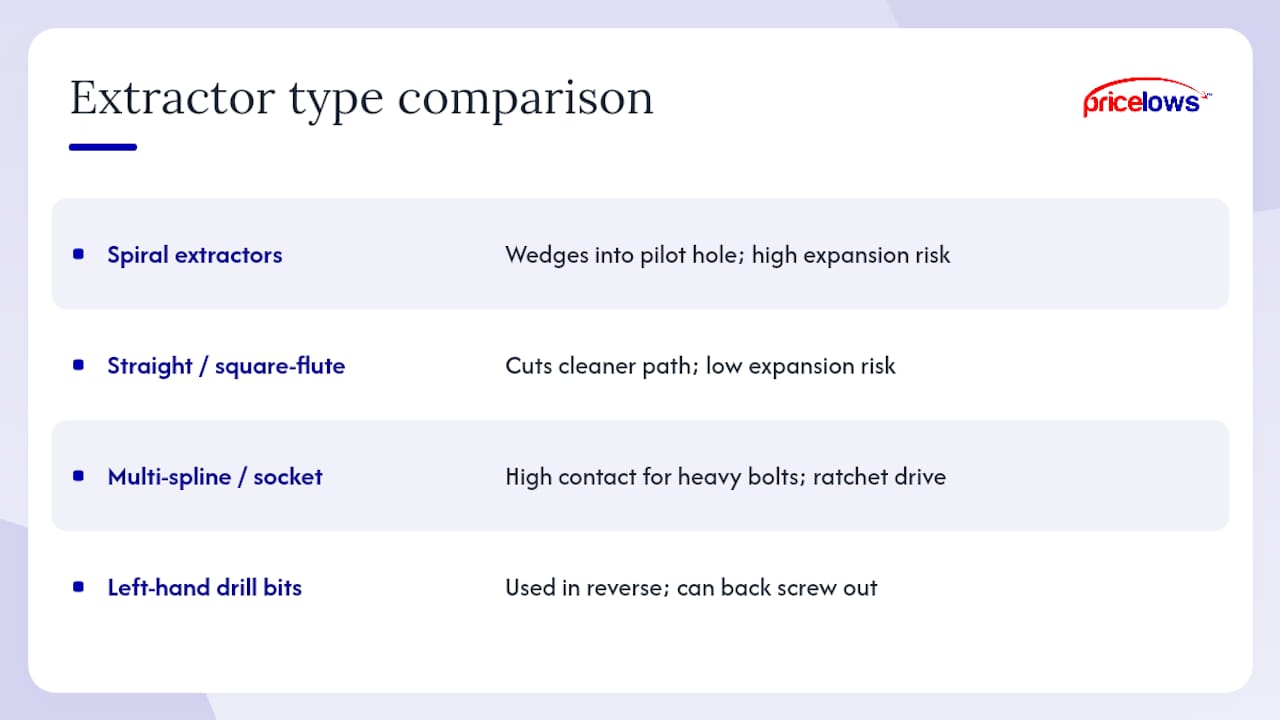
Multi-spline and socket-style extractors handle heavier fasteners, bolts, and lug-style hardware where you need more surface contact and torque than a single spiral flute can deliver. These pair with a ratchet or breaker bar instead of a tap wrench.
Left-hand drill bits deserve a mention on their own. Chuck one into your drill, run it in reverse, and on a lot of stripped screws the bit catches the remaining threads and backs the screw straight out. No extractor required.
Pro Tip: Keep one spiral extractor set for general household screws and one straight-flute or multi-spline set for automotive and heavier steel work. Trying to make one kit do both jobs is how extractors snap.
How Do You Prepare a Screw for Extraction?
Most failed extractions trace back to skipped prep, not a bad tool. Diagnosis and setup do the heavy lifting before the drill ever touches metal.
Start by reading the screw. Is the head rusted, snapped flush, or just stripped but intact? A flush or below-surface break changes your approach entirely compared to a screw with a stripped head still sitting proud of the surface. Rust suggests you’ll need penetrating oil and patience; a clean break in bright metal suggests a harder fastener that sheared under torque, which is itself a clue you might be dealing with a higher-grade bolt.
Gather your tools before you start drilling:
- A screw extractor set with multiple sizes, ideally including left-hand bits
- A drill with a stable chuck and left-hand drill bits sized to your pilot hole chart
- A center punch and hammer
- Penetrating oil
- A tap wrench or T-handle for manual turning
- Clamps to hold the workpiece steady
- Safety glasses, always
With tools in hand, work through the setup in order. Clean loose rust and debris off the screw head. Soak it in penetrating oil for at least fifteen minutes, longer on badly corroded fasteners. Tap the screw gently with a hammer and punch to help oil work into the threads and break the corrosion bond. Where the material allows it, a few seconds of heat from a heat gun expands the metal and can crack rust free. Finally, clamp the workpiece so it can’t shift, and strike a clean, centered punch mark exactly where you’ll drill.
Step-by-Step: How to Extract a Broken Screw
This is the procedure itself, in order, with the details that separate a clean extraction from a snapped extractor.
-
Confirm your center mark. Your punch mark from the prep stage should sit dead center on the screw. If it’s off, a pilot hole drilled slightly crooked will throw off everything downstream, including how evenly the extractor seats.
-
Match your pilot hole to the extractor size. Every extractor set comes with a sizing chart matching extractor number to recommended drill bit diameter. Undersized holes make it hard to seat the extractor fully; oversized holes leave nothing for the extractor to bite. As a rough guide, most household screws call for a pilot hole between 1/8 inch and 1/4 inch, but always check the chart that ships with your specific set rather than eyeballing it.
-
Drill slowly, at low speed. Use a drill press or a hand drill on its lowest speed setting. High speed generates heat, which can work-harden the screw’s surface and make the next step tougher. Drill to the depth your extractor size calls for. Rushing this step is the single most avoidable cause of a bad start.
-
Clear the shavings. Back the drill bit out periodically to clear metal shavings from the hole. Packed shavings interfere with the extractor seating fully and can cause it to bind off-center.
-
Seat the extractor by hand. Insert the extractor into the pilot hole and tap it gently with a hammer to set it. It should sit snug, not loose, before you apply any turning force.
-
Turn counterclockwise with a tap wrench or T-handle, not a power drill. This is where a lot of DIY extractions go wrong. A hand tool lets you feel resistance in real time; a drill running at speed does not, and that’s exactly how brittle extractors snap under sudden torque. Apply steady, even pressure and let the reverse thread do its job.
-
Watch for the bite. If the extractor is gripping properly, you’ll feel the screw start to rotate within the first few turns. Keep turning slowly and steadily until it clears the hole completely. With the right tool and setup, a full extraction often takes well under a minute once the extractor actually bites.
-
If it doesn’t bite, stop and reassess rather than forcing it. Increased resistance without rotation usually means the extractor isn’t seated well or the screw is harder than expected. Forcing it from here is how extractors snap inside the hole.
-
Finish and inspect. Once the screw is out, clean any remaining shavings from the threads. Check the surrounding material for damage; if the original threads are torn or oversized, you may need to retap the hole or install a thread insert before reassembling.
What Do You Do When the Extractor Won’t Bite?
Before jumping to destructive methods, a handful of quick fixes solve most stuck extractions.
- Back the extractor out, clear any shavings from the pilot hole, and re-seat it with a firm tap.
- If the current extractor feels loose or is chewing without gripping, step down to a smaller extractor with a slightly narrower pilot hole.
- Add another round of penetrating oil and a short heat cycle, then let it sit for a few minutes before trying again.
- Reclamp the workpiece if there’s any wobble, and apply torque in slow, steady increments rather than one hard twist.
- If the screw head or a stub is still exposed above the surface, try locking pliers or a socket-style external extractor instead of drilling further.
- If none of that works and the screw still won’t turn, stop trying to extract it and switch to drilling it out entirely rather than risking a snap.
Knowing when to quit the extraction approach and move to drill-out is as valuable as the extraction technique itself.
What Happens When an Extractor Snaps Inside the Screw?
Extractors snap for one of two reasons: the extractor itself was brittle or undersized for the torque applied, or the fastener was a higher grade than it looked, usually a hardened bolt that never should have encountered a standard spiral extractor in the first place. Either way, the moment you feel it give and stop turning, stop applying force immediately. Continuing to twist a snapped extractor fragment just work-hardens it further and makes every recovery option harder.
Recovery depends on what’s left exposed:
- If a fragment still protrudes, needle-nose or locking pliers can sometimes grab and back it out directly.
- A carbide burr, run slowly, can grind down a stubborn extractor tip without overheating the surrounding material.
- Carbide-tipped bits are the only realistic option for drilling through broken extractor steel, since standard high-speed steel bits won’t cut it.
- For a stud sheared flush with a hardened bolt, welding a nut onto the exposed stub and backing it out with a wrench is often the most reliable homeowner-adjacent fix.
- When a fragment is buried deep or the surrounding part is expensive to replace, a machine shop offering EDM (electrical discharge machining) or precision milling is worth the cost over guessing with a drill.
Pro Tip: If you suspect a bolt is high-tensile before you ever touch a drill, skip the extractor entirely and go straight to a left-hand bit or the weld-a-nut method. It’s faster than recovering from a snap.
How Do You Choose and Maintain an Extractor Kit?
A good extractor kit comes down to three things: steel quality, size range, and what’s included alongside the extractors themselves. Look for M2 or high-speed steel (HSS) construction, since that grade resists the brittleness that causes snapping under load. A kit that spans multiple sizes with matching left-hand drill bits saves you from guessing at pilot hole dimensions mid-job, and solid case packaging keeps tapered extractor tips from chipping against each other in a drawer.
Maintenance is simple but easy to skip. A few habits keep a kit usable for years:
- Wipe extractors clean of metal shavings and oil residue after every use.
- Never force a turn past the point of resistance; over-torquing is the top cause of premature snapping.
- Retire any extractor with a visibly chipped or rounded tip rather than pushing it through one more job.
- Store extractors in their case, not loose in a toolbox drawer where tips knock against other metal.
For reassembly work after extraction, a magnetic screwdriver set covers most household screw heads, while a set of specialty-shaped screwdriver bits handles the odd security or tamper-resistant heads you’ll run into on appliances and furniture. Pairing solid drill bits with your extractor kit, as covered in this drill bit type breakdown, rounds out a starter setup that handles both the extraction and the fix that follows it.
Who Wrote This Guide?
This guide comes from Thane Holland, covering practical tool use and repair techniques for PriceLows™. For related reading, see the breakdown of drill bit types and geometries and the torque wrench guide for controlling turning force on fasteners beyond screws.
An experienced retailer has spent many years vetting home, yard, and garage products so shoppers don’t have to guess which tools hold up. The toolkit recommendations throughout this guide map directly to what PriceLows™ carries, so there’s no separate search required once you know what you need.
How Do You Loosen a Stripped or Rusted Screw First?
Before an extractor ever comes out, it’s worth trying to save the screw head entirely, since a screw that turns normally never needs extraction at all.
For a stripped head that’s still intact, a rubber band pressed between the screwdriver tip and the screw slot adds friction and often restores enough grip to back it out. A manual impact driver, the kind you strike with a hammer, can also break a stuck screw free by combining a sharp rotational jolt with downward pressure, which works especially well on screws that are stuck from paint or debris rather than true corrosion.
Rust calls for a different approach. Soak the screw head in penetrating oil and give it real time, fifteen minutes minimum, longer on anything that’s been exposed to weather for years. A few sharp taps with a hammer and punch help the oil penetrate past the rust and reach the actual threads. If the screw still won’t move, a heat gun applied briefly to the surrounding material expands the metal slightly and can crack the rust bond enough to get movement.
Only move to drilling and extraction once these lower-risk methods have genuinely failed. Jumping straight to an extractor on a screw that just needed better grip or a longer oil soak wastes a pilot hole you didn’t need to drill, and every pilot hole is a small risk to the surrounding material even when the job goes well.
How Do You Protect Surrounding Material During Extraction?
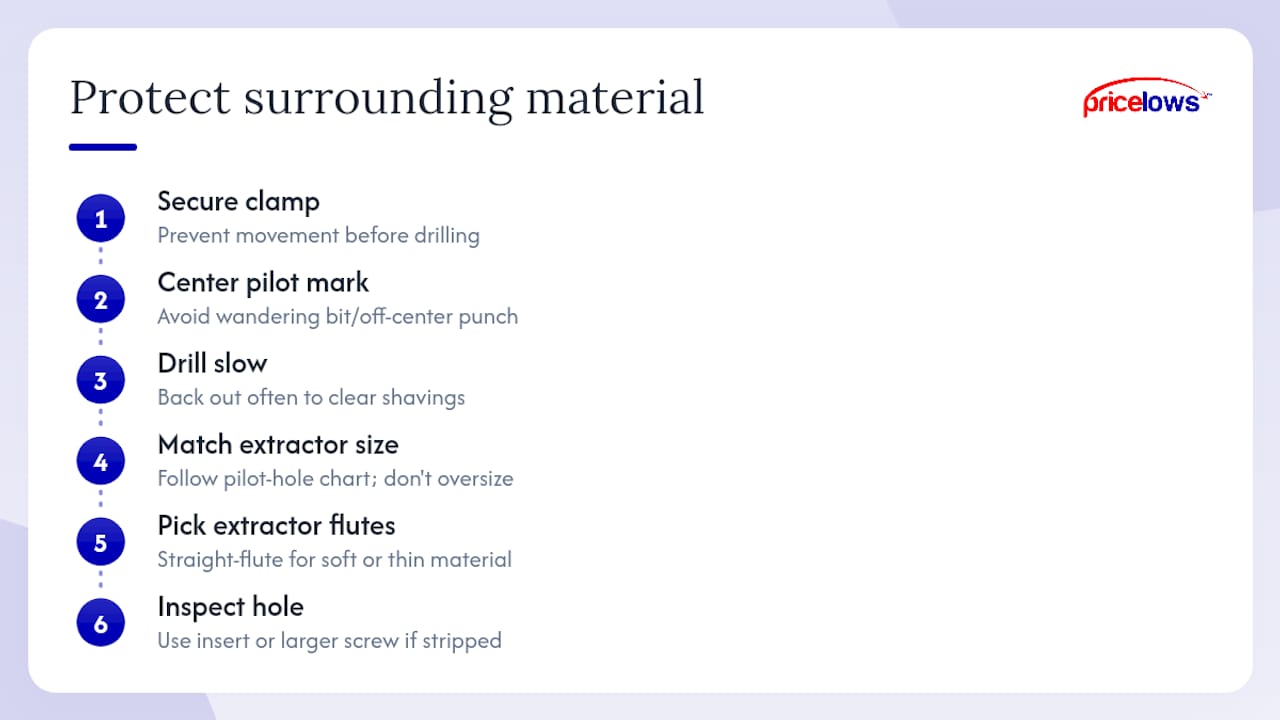
The pilot hole you drill for extraction is permanent, so protecting the material around it starts before you ever pick up the drill. A wandering bit or an off-center punch mark is the most common cause of extractor damage that spreads beyond the original screw.
Clamp the workpiece securely before drilling. Any movement during the pilot hole step throws the hole off-center, which then forces the extractor to bite at an angle instead of straight down the screw’s axis. That angled bite is what chews out surrounding threads instead of just gripping the screw.
Drill at low speed and back out frequently to clear shavings. A bit running too fast generates heat that can warp thin surrounding material, especially in aluminum housings or sheet metal panels where the screw sits close to an edge.
Match your extractor size precisely to the pilot hole chart rather than sizing up “to be safe.” An oversized extractor forced into an undersized hole spreads outward and can crack a casting or split wood around the screw. If you’re working in a soft material like wood furniture or thin sheet metal, consider a straight-flute extractor over a spiral one specifically because it expands the pilot hole less as it seats.
Finally, once the screw is out, inspect the hole immediately. Threads that feel loose or stripped in the parent material need a thread insert or a slightly larger replacement screw, not just a fastener dropped back into a damaged hole.
What Are the Alternatives to a Screw Extractor?
An extractor isn’t always the right tool, and a few alternatives solve the same problem with less risk to the surrounding material.
A manual impact driver, struck with a hammer, applies rotational force and downward pressure at the same time, which frequently breaks a stuck or lightly stripped screw free without drilling anything. It’s often the first thing worth trying on a screw that’s stuck rather than truly damaged.
Left-hand drill bits do double duty as a genuine alternative rather than just a backup to extraction. Chucked into a drill running in reverse, the bit’s cutting edges can catch the screw’s remaining threads mid-drill and spin the whole fastener out, no extractor needed at all.
For screws with a badly stripped head but a shank you can still access, locking pliers clamped directly onto the head, or onto a stub if the screw has sheared partway, provide enough grip to back it out by hand. This works best on screws that protrude even slightly above the surface.
Cutting a new slot into a stripped or rounded screw head with a rotary tool or a hacksaw blade turns a lost head back into something a flat screwdriver can grip. It’s crude, but it works surprisingly often on softer screws.
For flush-sheared, hardened bolts, welding a nut onto the stub remains a pro-standard method precisely because it sidesteps extractor brittleness altogether. When none of these apply and the fastener sits somewhere critical, a machine shop with EDM capability is the last realistic step before replacing the whole part.
The Real Lesson Behind Extractor Failures
Most advice on this topic treats extraction as a tool problem: buy the right extractor, follow the steps, done. That framing misses what actually separates a clean extraction from a ruined project, which is knowing when not to use an extractor at all. A hardened Class 8.8 bolt doesn’t care how good your technique is. It will snap a standard spiral extractor regardless of how carefully you drilled the pilot hole, and no amount of penetrating oil changes that outcome.
The conventional wisdom undersells preparation and oversells the extraction moment itself, as detailed in the challenges of DIY door replacement. Diagnosis, clamping, and an accurate center punch decide most outcomes before the extractor ever touches metal. If there’s one thing worth prioritizing first, it’s an honest read of what you’re actually working with: material, grade, and condition, before you commit to drilling anything.
Buy a decent kit, respect what it can’t do, and you’ll rarely need the recovery techniques at all.
— Thane Holland
Where to Get the Right Tools for This Job
A reliable online store makes it simple to gear up for a screw extraction job without hunting across a dozen retailers for parts that actually match.
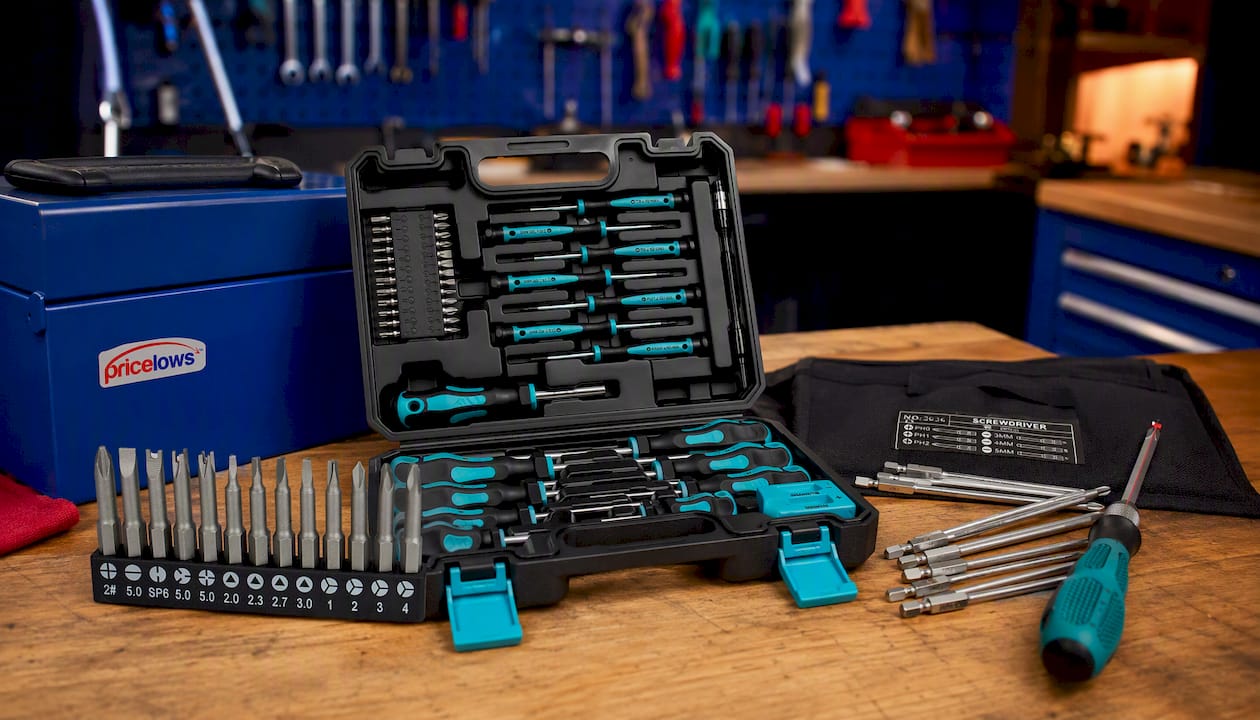
Start with the 43-piece magnetic screwdriver set if you want one all-purpose case that handles reassembly work after almost any extraction. If you regularly run into odd or specialty screw heads, the 5, 7, and 13-piece specialty screwdriver set covers shapes a standard driver can’t touch. And if you already own a drill or driver and just need reliable bits, the 9-piece chrome vanadium bit set is built for exactly that kind of repeat use.
Browse the full home, yard, and garage lineup to build out a complete kit in one order, and check out today to lock in free shipping on your set.
Sources
- How to Use a Screw Extractor: Remove Damaged Screws!
- How to remove stripped screws with screw extractors - Tools Consultant
- Best screw extractor — BobVila article (Tools guidance)
- Removing stripped screws with a screw extractor
FAQ
How Do You Use a Screw Extractor Correctly?
Center punch the screw, drill a pilot hole sized to your extractor chart, seat the extractor by hand, and turn it counterclockwise with a tap wrench or T-handle rather than a power drill. Done correctly with the right prep, extraction often finishes quickly with proper tools and technique once the extractor bites.
How Do You Know What Size Extractor to Use?
Match the extractor number to your screw’s diameter using the sizing chart included with your kit, then drill the pilot hole to the diameter that chart recommends for that extractor. Most household screws fall in the 1/8 inch to 1/4 inch pilot hole range, but always confirm against your specific kit rather than estimating.
What Are the Most Common Mistakes With Screw Extractors?
The biggest mistakes are skipping penetrating oil and center punching, drilling the pilot hole too fast or off-center, and turning the extractor with a power drill instead of a hand tool. Forcing an extractor past resistance, rather than backing out and reassessing, is what causes most snaps.
Are Screw Extractors Actually Effective?
Yes, on mild and medium steel screws that are stripped, corroded, or partially rounded, an extractor paired with proper prep works reliably. They’re far less effective on hardened, high-tensile bolts, where standard spiral extractors frequently fail or snap regardless of technique.
Can You Use a Screw Extractor on Any Type of Bolt?
No. Extractors need to be harder than the fastener they’re removing, so they work well on standard steel screws but struggle badly on Class 8.8 and higher bolts. For those, left-hand drill bits or the weld-a-nut method are safer first choices than a standard extractor kit.