


What Does Craft Supply Storage Mean for Families
TL;DR:
- Effective craft supply storage organizes materials in designated zones for easy access and quick cleanup. Maintaining a system involves regular decluttering, labeling, and resetting, ensuring supplies stay accessible and organized. Small spaces benefit from vertical and mobile storage solutions, while clear containers help prevent unnecessary purchases.
Craft supply storage is defined as a system of designated locations, such as cabinets, bins, shelves, and workstations, that organizes craft materials for easy visibility, quick access, and simple return. The term “craft supply storage” is the everyday phrase most families use, while professional organizers often call it a craft organization system. The goal is never just to hide clutter. A well-built system gives every item a home, groups supplies by how you actually use them, and makes cleanup as fast as getting started. Labeling, zoning, and choosing the right containers are the three pillars that separate a storage system from a pile of bins.
What does craft supply storage mean for your workflow?
Effective craft supply storage means your materials are ready when inspiration strikes. Craft-room guidance measures accessibility by time and effort, advising you to reposition any item that takes more than a few seconds to reach. That standard is worth taking seriously. If you spend two minutes hunting for scissors before every project, storage is working against you, not for you.

Zone-based organization takes this further. Zone-based storage groups supplies by crafting activity rather than by item type alone. A stamping zone, for example, holds inks, adhesives, and stamps together, even though those are three different supply categories. You gather everything for one project in one move instead of crossing the room three times.
Here is a practical sequence for building a workflow-friendly setup:
- Map your most-used supplies. List the tools and materials you reach for on every project.
- Place those items at arm’s reach. Store them at your dominant hand’s side, between hip and shoulder height.
- Group by activity zone. Cluster supplies that belong to the same type of project, not just the same material category.
- Label every container. Use large, readable fonts so you can identify contents at a glance.
- Leave return paths clear. Every item needs a spot it can go back to in under five seconds.
Pro Tip: A well-designed craft room minimizes the need to stand or walk for supplies by integrating storage within the work area. If you have to leave your chair to get a basic tool, move that tool closer.
What are the common types of craft storage solutions?
Different storage types solve different problems. Choosing the right one depends on your space, your supply volume, and how you work.
| Storage Type | Best For | Key Benefit |
|---|---|---|
| Cabinets with compartments | Large supply collections | Hides clutter, protects supplies |
| Clear bins and drawers | Frequently used items | Instant visibility without opening |
| Pegboards | Tools and scissors | Wall-mounted, frees desk space |
| Rolling carts | Small or shared spaces | Mobile, easy to tuck away |
| Modular shelving | Growing collections | Scales as your supply volume grows |
| Compartmentalized organizers | Small items like beads, buttons | Prevents mixing and loss |
Craft supply cabinets with tailored compartments act as central hubs that minimize searching time and maximize how much you can store in one place. They work best for families with large collections or dedicated craft rooms.
Clear containers deserve special attention. Clear, labeled containers protect supplies while making them visible, which directly reduces redundant purchasing. When you can see that you already have three rolls of washi tape, you stop buying a fourth. Opaque containers cost less and look tidier, but they require disciplined labeling to stay functional.
A few principles to guide your selection:
- Use clear bins for supplies you reach for daily.
- Use opaque bins or cabinets for seasonal or rarely used items.
- Choose stackable storage bins to build vertical storage without buying new furniture.
- Add a pull-out shelf organizer inside deep cabinets so nothing gets buried at the back.
How to organize and maintain craft supply storage long-term
A storage system only works if you maintain it. The most common reason systems fail is that families set them up once and never adjust them.
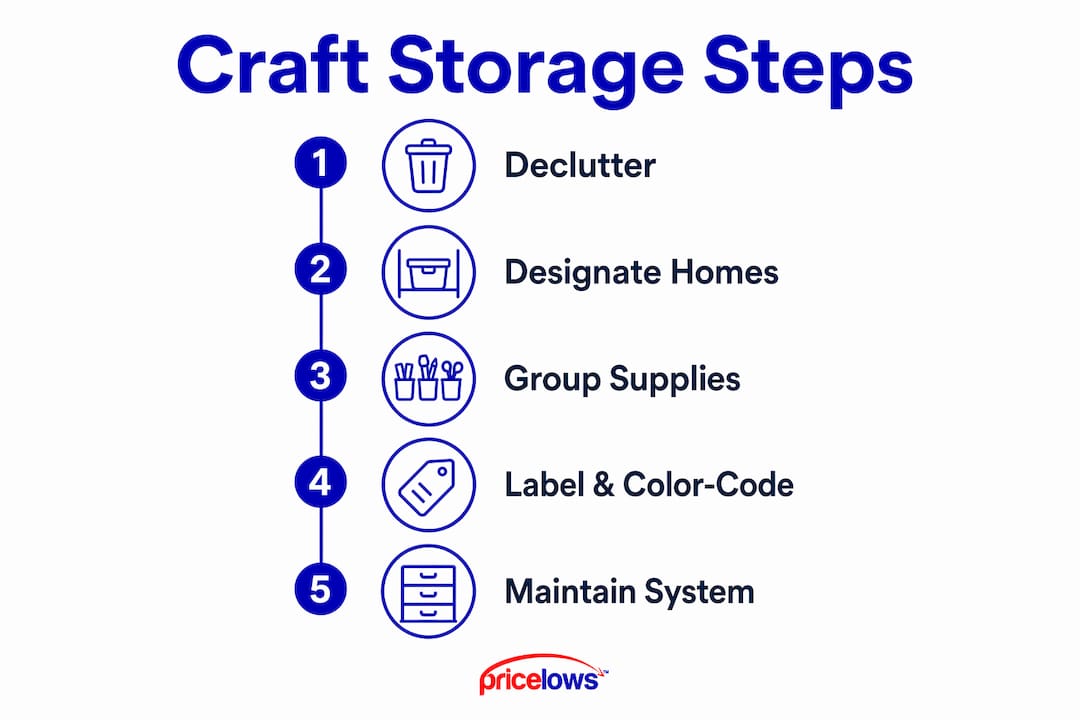
Start by decluttering before you organize. Remove expired glue, dried-out markers, and supplies for hobbies you no longer practice. Organizing around items you do not use wastes space and creates confusion. Once you have only what you actually need, assign every item a home.
Visible storage of frequently used supplies reduces accidental repurchases and encourages regular use. Rarely used items can live out of sight in labeled bins on high shelves or in a closet. This separation keeps your main workspace clear without losing track of what you own.
Sustaining the system requires two habits:
- End-of-session resets. A quick reset routine at the end of each craft session prevents clutter from building up over days. Set a five-minute timer and return everything to its labeled home before you stop.
- Work-in-progress containers. Keep a dedicated bin or tray for active projects. This stops half-finished work from spreading across your entire workspace and losing small pieces.
Pro Tip: Visibility without structure creates visual noise and decision fatigue. Combine clear containers with labeled compartments so your eye lands on exactly what you need, not everything you own at once.
Color coding adds another layer of speed. Assign a color to each family member or each craft type, then use matching labels or bin colors. A child can return supplies independently when their bin is always the red one.
What storage strategies work best in small or shared spaces?
Small spaces demand vertical thinking. Wall-mounted pegboards, rolling carts, and selective access storage reduce clutter and make the most of limited square footage. The floor is the most expensive real estate in a small room. Keep it clear.
A practical approach for small or multi-use areas:
- Mount pegboards or wall shelves above your work surface for tools, scissors, and frequently used supplies.
- Use a rolling cart for your current project’s supplies. Roll it out when you work, roll it away when you are done.
- Store rarely used supplies offsite. A labeled bin in a closet or garage keeps your workspace focused on what you actually use this month.
- Choose multipurpose furniture. An ottoman with interior storage or a bench with drawers doubles as seating and a small parts organizer for craft materials.
- Keep the work surface clear by default. Only the current project lives on the table. Everything else lives in its designated storage spot.
Storage-first crafting means your setup opens into your workflow and closes away when you are done. This philosophy is especially valuable in shared spaces like a kitchen table or a living room corner.
Key Takeaways
Craft supply storage works best when every item has a designated home, supplies are grouped by activity zone, and a short reset routine runs at the end of each session.
| Point | Details |
|---|---|
| Define designated homes | Every supply needs a specific spot so it can be found and returned in seconds. |
| Use zone-based grouping | Group supplies by crafting activity, not just item type, to cut down on searching. |
| Combine visibility with structure | Clear containers plus labels reduce visual noise and prevent duplicate purchases. |
| Build reset routines | A five-minute end-of-session reset prevents clutter from accumulating over time. |
| Think vertically in small spaces | Pegboards, wall shelves, and rolling carts free floor space and keep work areas clear. |
Why accessibility beats aesthetics in craft storage
I have seen beautifully styled craft rooms that were completely unusable within two weeks. Everything looked great on the shelf, but nothing had a logical home. The owner kept buying more storage bins to solve a problem that was actually about system design, not container count.
The shift that changes everything is treating storage as part of the creative process, not a separate chore. When your storage opens into your workflow, you spend less time setting up and cleaning up. That means more time actually making things. A clear home for every supply is not just tidy. It is the thing that makes you want to sit down and start a project instead of avoiding the mess.
Aesthetics matter, but only after function is solved. Pick containers that look good to you, but pick them because they fit your supplies and your workflow first. A mismatched set of labeled bins that you actually use beats a color-coordinated display that you are afraid to disturb.
— Thane Holland
Affordable craft storage options at PriceLows™
PriceLows™ carries a range of storage products built for families who want function without overspending. Whether you are setting up a dedicated craft room or carving out a corner of the living room, the right cabinet or bin makes the whole system work.

The Black Metal Storage Cabinet with Lock and Shelves is a strong anchor piece for any craft storage setup. It offers secure, lockable storage with adjustable shelves that fit supplies of all sizes. Pair it with stackable closet organizer baskets for smaller items like ribbons, stamps, and thread. PriceLows™ ships every order free and backs it with a 100% shipping protection plan, so your storage setup arrives ready to use.
FAQ
What does craft supply storage mean?
Craft supply storage means setting up designated locations, such as cabinets, bins, and shelves, to organize craft materials for easy access and return. The system prioritizes visibility, labeling, and zone-based grouping over simply hiding supplies.
What is the difference between craft storage and craft organization?
Craft storage refers to the physical containers and furniture that hold your supplies. Craft organization is the system of rules, labels, and zones that makes those containers work together efficiently.
How do I store craft materials in a small space?
Mount pegboards above your work surface, use a rolling cart for active projects, and store rarely used supplies in labeled bins in a closet or garage. Keeping the work surface clear by default is the single most effective habit in a small space.
Why should I use clear containers for craft supplies?
Clear containers let you see what you have without opening anything, which reduces the time spent searching and prevents buying duplicates. Pairing clear containers with labels adds structure so your eye finds exactly what you need.
How often should I reset my craft storage system?
A five-minute reset at the end of every craft session is enough to keep the system working. A deeper review every few months lets you remove supplies you no longer use and adjust zones as your hobbies change.