


Garage Workbench Setup Examples for Every DIY Hobbyist
TL;DR:
- A garage workbench setup includes a dedicated surface, storage, and organization systems suitable for various projects. The best setups feature a proper height, clear zone planning, and accessible storage to boost efficiency. DIY options cost less and can be tailored to fit small or multi-use garages through fold-down, mobile, or modular designs.
A garage workbench setup is defined as a dedicated work surface combined with storage and organization systems that support hands-on projects in a home garage. The best examples of garage workbench setups share three traits: a surface at the right working height, a clear zone plan, and storage that keeps tools within arm’s reach. Standard bench dimensions run 34–36 inches tall with a surface at least 2 feet deep by 4 feet wide. That size lets your palms rest flat without hunching, which matters on a three-hour build day. DIY builds often cost 50% less than pre-fabricated options, with custom systems ranging from $30 to $900 depending on materials and complexity.
1. What are the main types of garage workbench setups?
Four core bench types cover the full range of hobby and DIY needs. Each suits a different garage size, budget, and project style.
- Fixed benches bolt to the wall or floor for maximum stability. They work best for woodworking and metalworking where vibration and clamping force demand a solid anchor. Closed lower cabinets keep tools dust-free.
- Mobile benches on locking casters let you reposition for different projects or clear the floor fast. Locking casters boost flexibility and mobile benches often double as outfeed support for table saws.
- Wall-mounted fold-down benches use 3/4-inch plywood topped with hardwood edging, hinged with heavy-duty piano hinges. They support up to 100 lbs and fold flat against the wall when not in use.
- Modular benches use interchangeable components you can rearrange as your projects change. They handle 80% of hobby tasks as efficiently as heavy fixed benches while offering far more flexibility.
Material choices matter too. Solid hardwood tops handle abuse well. Plywood with a sacrificial layer costs less and repairs faster. Steel frames outlast wood in humid garages.
2. How can garage workbench setups work in small or multi-use garages?
Space is the biggest constraint most hobbyists face. The right setup turns a one-car garage into a functional workshop without sacrificing parking.
- Fold-down benches clear the floor in seconds. A basic fold-down can be built in a weekend for $80–$120, making it the most affordable entry point for a shared garage.
- Mobile benches roll against the wall when a car needs to come in. They require no permanent installation and move with you if you change homes.
- Pegboards and French cleat walls move tool storage off the floor and countertop entirely. Vertical storage is the single biggest multiplier for usable floor space in a compact workshop.
- Ceiling storage tracks handle seasonal items and bulky gear, freeing wall space for active tool storage.
- Compact tool carts slide under the bench when not in use, adding drawer storage without a permanent footprint.
Planning your garage zones before buying a single piece of equipment prevents the most common layout mistakes. Sketch the floor plan first, then buy.
Pro Tip: Tape out your bench footprint on the garage floor before building or buying. Live with it for a week. You will spot conflicts with doors, cars, and foot traffic that no drawing reveals.
3. DIY design ideas and construction methods for your workbench
Building your own bench gives you exact dimensions, better materials, and a lower price than any pre-built option. The construction choices you make at the start determine how long the bench lasts and how easy it is to maintain.
- Use a sacrificial MDF layer on your plywood top. A sacrificial MDF layer protects the structural plywood beneath. When the surface gets chewed up by saw cuts and glue spills, you replace a $15 sheet instead of rebuilding the whole bench.
- Build a torsion box top for flatness. A torsion box uses a grid of internal ribs sandwiched between two thin panels. The result is a surface that stays flat under heavy loads without the weight of solid hardwood.
- Stick to standard lumber dimensions. Building around 2x4 and 2x6 framing lumber keeps costs low and cuts simple. Avoid custom sizing that forces you to rip every board.
- Add a face vise on the left front corner. A face vise is the most useful clamping addition for woodworking. It holds boards for hand planing, sawing, and assembly without clamps scattered across the surface.
- Install T-tracks for bench accessories. T-track installations require a straight-edge guide for your router to cut clean grooves. Once in place, stops, hold-downs, and jigs lock anywhere along the track in seconds.
Pro Tip: Build the bench 2 inches taller than you think you need. You can always add a thick sacrificial top to drop the working height. You cannot easily raise a bench that is already framed.
4. What are effective organization ideas to complement your workbench?
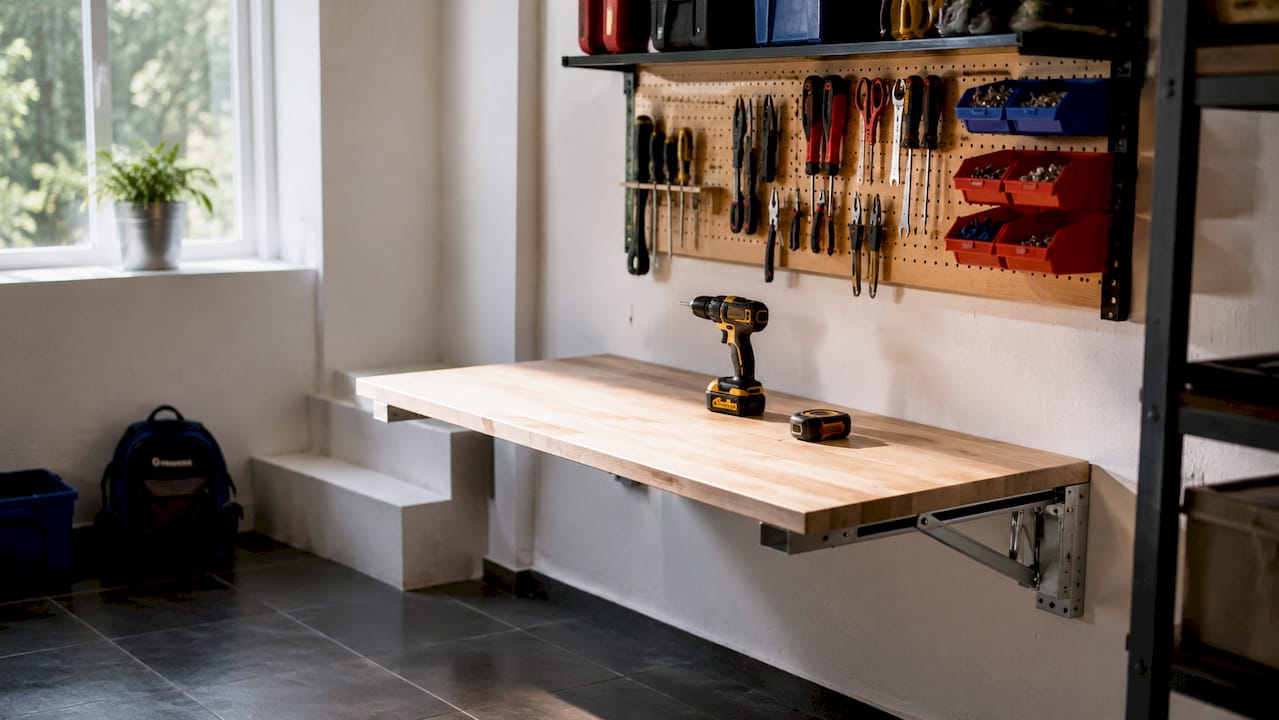
Organization is what separates a productive workshop from a cluttered storage room. The layout of your storage directly controls how fast you can start and finish a project.
A pegboard near the bench keeps the tools you reach for every session visible and within arm’s reach. French cleat walls behind or beside the bench handle heavier items and longer tools on custom holders you build yourself. The combination of both systems gives you a scalable storage setup that grows with your tool collection without requiring a full reorganization every time you add something new.
Small parts organizers mounted to the pegboard or hung on French cleats solve the hardware chaos problem. Bins labeled by fastener size, sorted by material, cut search time on every project. Lighting deserves the same attention as storage. Linked LED shop lights arranged in a chain pattern deliver even coverage with no shadows, which matters most during detailed layout and finishing work.
| Organization method | Best use | Key benefit |
|---|---|---|
| Pegboard with hooks | Frequent-use hand tools | Instant visual access |
| French cleat wall | Heavy or bulky tools | Fully customizable layout |
| Small parts bins | Fasteners, hardware | Reduces search time |
| LED shop light chain | Full bench coverage | Eliminates shadows |
| Labeled drawer inserts | Power tool accessories | Protects bits and blades |
5. How different setups suit different hobbyist needs
The right bench for woodworking is the wrong bench for electronics. Matching your setup to your primary hobby prevents frustration and wasted money.
Woodworking demands a flat, heavy, fixed bench with serious clamping capacity. A face vise, bench dogs, and a thick top are non-negotiable. The bench needs to stay put when you push a hand plane across a board.
Electronics and hobby assembly need a clean, static-safe surface with a dedicated shelf for components, bins, and a magnifying lamp. A mobile bench works well here because the project rarely generates vibration or clamping force.
Metalworking requires a steel-framed bench or a concrete-topped surface that handles grinding sparks and welding heat. Good overhead lighting is critical because metal layout lines are fine and easy to miss under poor light.
General DIY and home repair benefit most from a modular setup with flexible storage. A hobby-dedicated garage space built around a mobile bench and a pegboard wall handles painting, assembly, repairs, and crafts without locking you into one workflow.
Key takeaways
The most effective garage workbench setup combines a correctly sized surface, a zone plan drawn before any purchase, and scalable storage that grows with your tool collection.
| Point | Details |
|---|---|
| Standard bench dimensions | Build or buy at 34–36 inches tall with a surface at least 2 by 4 feet. |
| Plan zones first | Sketch your garage layout before buying tools or benches to avoid clutter. |
| DIY saves real money | Custom builds cost 50% less than pre-fabricated benches with better fit. |
| Match bench type to hobby | Fixed for woodworking, mobile for electronics, fold-down for shared garages. |
| Layer your storage | Combine pegboard, French cleats, and labeled bins for a scalable system. |
What I have learned after years of garage workshop setups
By Thane Holland
The most common DIY mistake is buying power tools before you have a proper bench and storage plan. I made that exact mistake. I had a table saw, a miter saw, and a router before I had a single shelf. Every project started with a 20-minute search for a tool I knew I owned.
The fix was not buying more storage. It was drawing the floor plan first and deciding where each activity would happen before anything else entered the garage. Once I had a zone for assembly, a zone for finishing, and a dedicated wall for hand tools, the right storage choices became obvious.
A fold-down bench changed how I use my garage more than any single tool purchase. It gave back floor space I did not know I was missing. I also stopped treating the bench surface as a shelf. A clear bench top is a productive bench top. That discipline alone cut my project setup time in half.
My honest advice: start with the bench, build the storage around it, and buy tools only when a specific project demands them. You will spend less and work better.
— Thane Holland
Storage solutions that complete your garage workbench
A well-built bench deserves equally capable storage beside it. PriceLows™ carries a rolling garage tool cabinet with a lockable steel chest and a powder-coated, rust-resistant finish that holds up in damp garage conditions. It rolls where you need it and locks when you do not.

For hobbyists who want a complete system, the 6-piece garage cabinet set from PriceLows™ includes a rubberwood worktop, pegboard panel, rolling chests, and lockers in one coordinated package. Every piece ships with free shipping and a 100% shipping protection plan. PriceLows™ has helped families build better garages for 15 years without the retail markup.
FAQ
What is the standard height for a garage workbench?
The standard workbench height is 34–36 inches. That height lets your palms rest flat on the surface without hunching, reducing fatigue during long sessions.
How much does a DIY garage workbench cost to build?
A custom DIY workbench typically costs $30 to $900 depending on materials and size. DIY builds generally cost 50% less than comparable pre-fabricated options.
What is the best workbench setup for a small garage?
A wall-mounted fold-down bench is the best option for small garages. It supports up to 100 lbs, folds flat when not in use, and can be built in a weekend for $80–$120.
What storage should I add to a garage workbench?
Pegboard for frequent-use hand tools and a French cleat wall for heavier items form the most effective combination. Add labeled small-parts bins for fasteners and hardware to cut search time on every project.
Should I plan my garage layout before buying tools?
Yes. Planning zones before acquiring tools prevents clutter and creates a more efficient workflow. Sketch the floor plan first, assign a zone to each activity, then buy only what each zone requires.