


7 Tight Jobs DIYers and Pros Use an Oscillating Tool For
An oscillating multi-tool earns its spot in a toolbox for precision plunge and flush cuts, detail sanding, scraping, and grout removal in spaces a full-size saw or sander can’t reach. It cuts wood, drywall, metal, PVC, and tile with the right blade. It won’t replace a circular saw or belt sander on big jobs, but for tight corners and finish work, nothing beats it.
TL;DR:
- The best blades for each material include bi-metal for mixed woods and screws, carbide-grit for grout and masonry, and diamond for heavy tile work.
- Oscillating tools operate at up to 20,000 oscillations per minute within a 2 to 5 degree arc, offering precise control for detail cuts near finished surfaces.
- For tasks like grout removal or fine sanding, using the appropriate blade and marking it for wear extends blade life and ensures cleaner cuts.
- The tool is ideal for plunge cuts, drywall openings, and trimming in tight spaces but is inefficient for large-scale ripping or full surface sanding.
- Proper safety practices include wearing goggles and masks, using the correct blade for the material, and switching blades with the power off to prevent accidents.
Table of Contents
- What Are the Main Oscillating Tool Uses?
- How Do You Use an Oscillating Tool for Common Jobs?
- Which Blade Should You Use for Each Material?
- What Pro Techniques Make Oscillating Tools More Effective?
- Who’s Behind This Guide and What PriceLows™ Offers
- When I Actually Reach for This Tool
- Building Out Your Oscillating Tool Kit
- Sources
- FAQ
What Are the Main Oscillating Tool Uses?
The tool’s oscillating head swings a blade back and forth 2 to 5 degrees at speeds up to roughly 20,000 oscillations per minute. That narrow, fast motion is what separates oscillating tools from rotary tools: a rotary bit spins in a full circle and tends to grab or fling debris, while the oscillating blade shears material with almost no kickback. That difference is why you can plunge straight into drywall two inches from a stud without tearing up the surrounding wall.
The main categories of oscillating tool applications break down like this:
- Cutting — wood trim, drywall, PVC pipe, thin metal, nails, and screws embedded in wood.
- Sanding — corners, edges, and detail work using triangular or finger pads.
- Scraping — dried adhesive, caulk, vinyl flooring glue, and old carpet backing.
- Grinding and polishing — light metal cleanup and paint removal with the right attachment.
- Grout and tile work — removing old grout lines without cracking the surrounding tile.
Materials it handles well include wood, drywall, sheet metal, PVC, tile, grout, and most construction adhesives. It also produces less airborne dust than a rotating grinder, because the blade shears material instead of flinging it, which is one reason Family Handyman recommends it for indoor trim and repair work where dust control matters.
One caveat before you grab it for everything: an oscillating tool is a detail instrument, not a production tool. For ripping full sheets of plywood or sanding an entire deck, a circular saw or orbital sander will finish the job in a fraction of the time.
How Do You Use an Oscillating Tool for Common Jobs?
Every task below starts the same way: pick the blade for the material, set a moderate speed, and let the blade do the work instead of forcing the tool through the cut.
-
Cutting wood trim and making plunge or flush cuts. Swap in a wood-cutting blade and, for undercutting door casings during flooring installs, use a flush-cut blade that rides flat against the floor. Score the cut line first at low speed to reduce tear-out, then increase speed once the blade has a groove to follow. Clamp a scrap block as a guide if you need a straight line, since freehand plunge cuts tend to wander in softer woods.
-
Drywall and electrical box cutouts. Mark your cutout with a level and a fixture template, then plunge in slowly at the corner. Depth control matters here: wrap a strip of painter’s tape around the blade at the depth you want to avoid punching through wiring or plumbing hidden in the wall cavity. Kreg Learn recommends scoring at low speed and removing material incrementally near any suspected wiring, and if you genuinely don’t know what’s behind the drywall, a cheap inspection camera through an existing outlet or switch box will save you an electrician’s bill.
-
Grout and tile removal. Fit a carbide-grit or diamond blade designed for grout lines, set the tool to a moderate speed, and work in short strokes along the grout channel rather than pressing straight down. Pressing too hard is the number one cause of chipped tile edges. Rotate the blade periodically as you work a long grout run so the grit wears evenly instead of dulling on one edge, a technique This Old House recommends for extending blade life on big jobs. If you’re prepping tile before laying new grout, pairing this with the right approach to drilling into tile helps you avoid cracked edges from the start.
-
Plumbing, pipe, and fastener trimming. A bi-metal blade handles PVC pipe, exposed nails, and protruding screws without much drama. Cut PVC in short, incremental strokes rather than one long push. The blade heats up fast in plastic, and pushing through in one motion tends to melt the cut edge instead of shearing it cleanly.
-
Sanding in corners and finish work. Attach a triangular sanding pad and start with a coarser grit to knock down high spots, then step down to a finer grit for the final pass. This is where the tool genuinely outperforms a random-orbit sander: the pointed pad gets into corners and against baseboards that a round sander simply can’t reach.
-
Scraping adhesive and caulk. A rigid scraper blade removes dried construction adhesive, old caulk beads, and vinyl flooring glue far faster than a hand scraper. Keep the blade angle low and let the oscillation do the shearing. Pressing the blade in at a steep angle tends to gouge softer substrates like drywall or plywood underlayment.
-
Demolition and fastener work in tight spots. For trimming protruding bolts or cutting nails flush in cramped spaces (baseboards, tight corners, under cabinets), a metal-cutting blade lets you work where a reciprocating saw or angle grinder physically can’t fit.
Pro Tip: Keep a second blade of the same type on hand for grout jobs longer than a few feet. Swapping to a fresh blade halfway through keeps your stroke count consistent and saves you from grinding through a dull blade at double the effort.
Which Blade Should You Use for Each Material?
Blade choice is the single biggest factor in how clean and fast your cut turns out. Match the blade to the material before you match the speed.
- Bi-metal blades — mixed materials, embedded nails or screws, general wood and light metal cutting.
- Carbide-grit blades — grout, cement board, and other abrasive masonry surfaces.
- Diamond blades — heavy masonry, porcelain tile, and the toughest grout jobs.
- Flush-cut blades — door casings, baseboard undercuts, anywhere you need the blade to ride flat against an adjacent surface.
- Scraper attachments — dried adhesive, caulk, and flooring glue removal.
On speed and pressure: start slow and increase gradually rather than opening the trigger all the way from the first pass. Pro Tool Reviews notes that most professionals rely on variable-speed control and at least 18,000 oscillations per minute to get clean cuts, since a larger oscillation angle around 4 degrees cuts faster but also raises vibration and heat. If you see smoke or sparks coming off the blade, that’s your tool telling you to ease up or switch to a fresh blade.
By the numbers: Oscillating tools swing their blades through a 2 to 5 degree arc at speeds up to roughly 20,000 oscillations per minute, according to a technical breakdown from Wikipedia. That narrow arc is what makes the tool controllable enough for surgical cuts near finished surfaces.
Maintenance is straightforward but easy to skip. Rotate carbide blades regularly during long grout runs to even out wear, watch for a worn carbide edge (sparking is the tell, per Family Handyman), and replace blades before they force you to compensate with extra pressure. On battery models, pull the pack before every blade change, not just when it’s convenient.
Safety basics don’t change much from other power tools, but they’re worth restating: safety glasses, a dust mask for drywall and grout work, a workpiece that’s clamped or otherwise immobile, and the battery removed anytime you’re swapping blades. A tool this small feels harmless right up until a blade change happens with the trigger still live.
What Pro Techniques Make Oscillating Tools More Effective?
Rotating carbide-grit blades isn’t just a nice habit, it’s the difference between one blade lasting a full grout job and burning through three. Mark the blade edge with a permanent marker after each rotation so you know which section of grit has seen the most wear, a method This Old House recommends for anyone tackling more than a few feet of grout line at once.
For clean wood cuts, run a strip of painter’s tape along the cut line before you plunge in. It reduces splintering on the top surface and gives you a visible guide line that’s easier to follow than a pencil mark once sawdust starts flying. A clamped scrap block against the blade path keeps straight cuts straight, especially on softer woods that tend to wander.
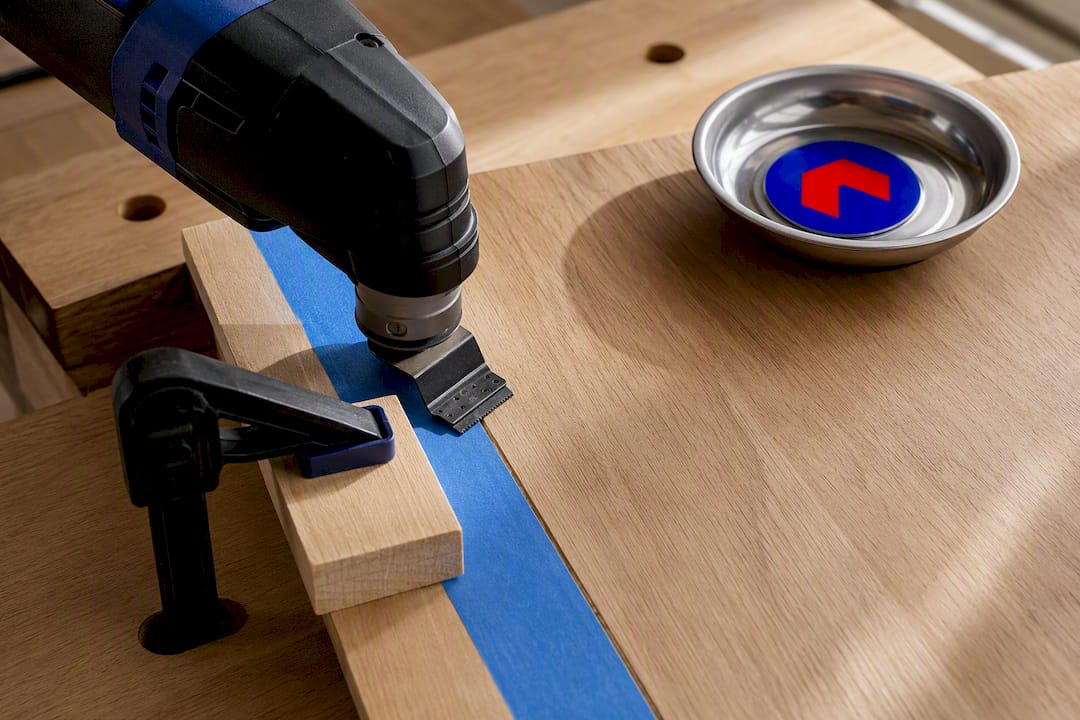
Depth marking with painter’s tape works for more than electrical cutouts. Lifting the tool slightly every few strokes on deep cuts clears sawdust from the kerf and keeps the blade from binding.
Pro Tip: Grip the tool with both hands whenever possible, one steadying the body and one guiding the head. Slow your speed noticeably on delicate materials like thin paneling or laminate, where a fast blade can chip the finish before you even feel resistance.
Who’s Behind This Guide and What PriceLows™ Offers
This guide comes from Thane Holland, drawing on hands-on home improvement and remodeling experience with the kinds of jobs covered above: trim work, tile repair, and tight-space cutouts where the right blade choice makes or breaks the result.
An online retailer has spent years helping cost-conscious homeowners fill out the garage without overspending on tools they’ll use twice a year. A few ways that shows up for oscillating tool owners:
- They offer shipping on most orders, so a blade kit or accessory doesn’t come with a surprise fee tacked on.
- Automatic 100% Shipping Protection on qualifying orders, covering you if something arrives damaged.
- They curate product listings across garage and DIY categories, so customers are given quality selections beyond stock photos.
- Straightforward advice on when a dedicated tool, rather than a multi-purpose one, is worth the extra drawer space.
If you’re building out a blade collection, start with a compatible sanding pad and a couple of bi-metal blades before spending money on specialty attachments you might use once.
When I Actually Reach for This Tool
Most of my oscillating tool jobs start the same way: undercutting a door casing before laying new flooring, or trimming a protruding screw in a spot a reciprocating saw can’t touch. It’s the tool I grab when precision matters more than speed.
I don’t reach for it when I’m ripping plywood sheets or sanding a full deck surface. A circular saw and a belt sander will beat it on raw output every time, and trying to force an oscillating tool through a big job just wears out blades for no good reason.
Every serious DIYer’s toolbox needs one. Just don’t expect it to replace the tools it’s meant to complement.
— Thane Holland
Building Out Your Oscillating Tool Kit
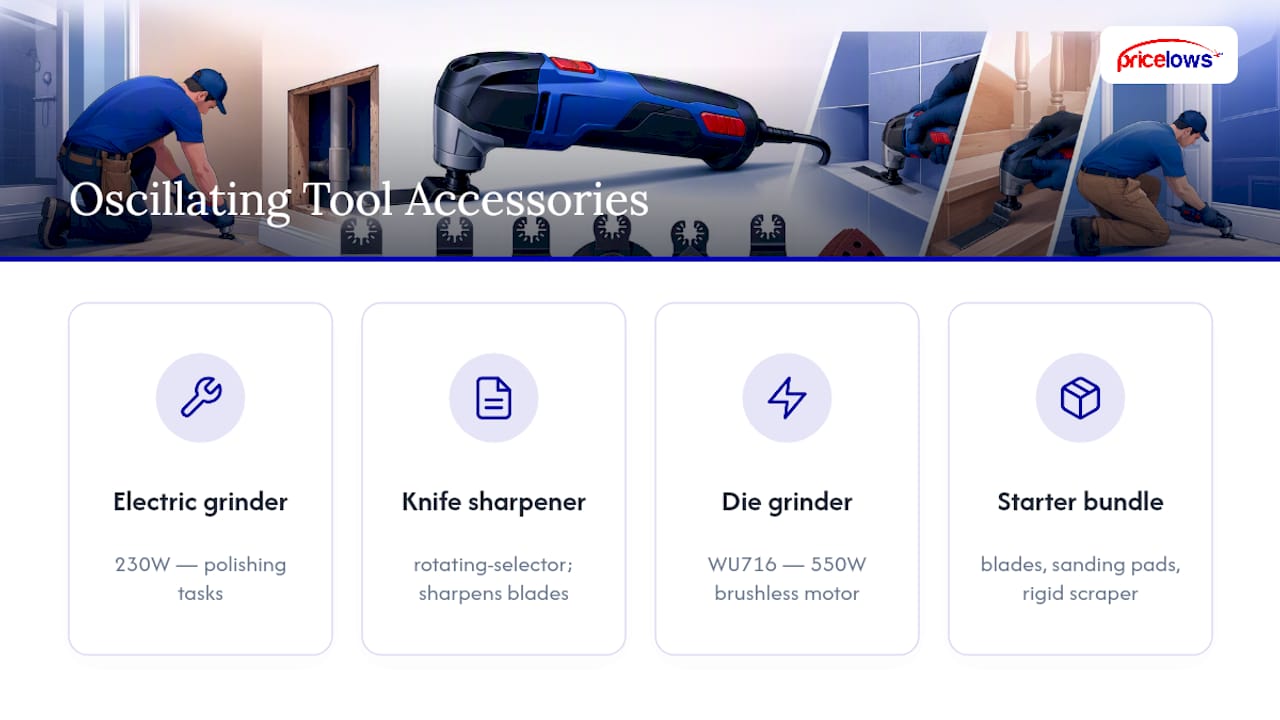
Once you’ve got the multi-tool itself, the accessories are where the real project flexibility comes from. If your work leans toward metal finishing or jewelry-scale detail, the S-R Hanging Electric Grinder with its 230W motor and stepless foot pedal handles polishing tasks your oscillating blade wasn’t built for.
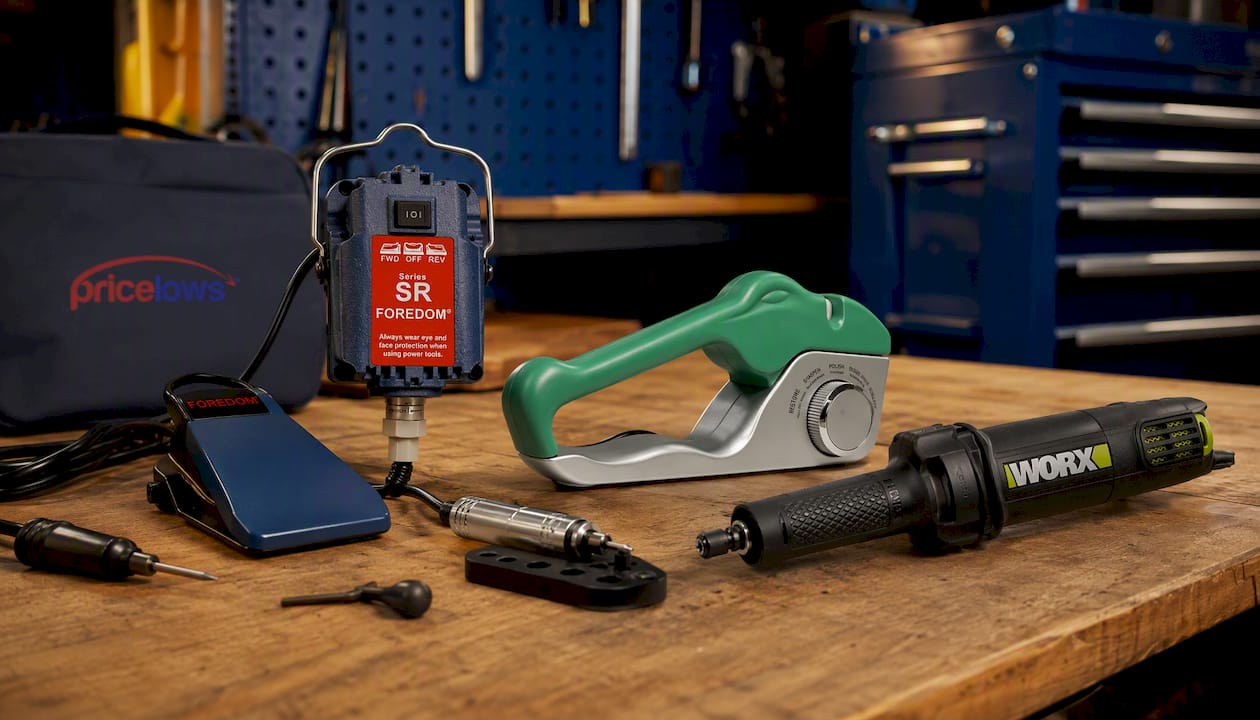
Keeping every blade sharp matters just as much as picking the right one. A rotating-selector knife sharpener is a low-cost way to keep utility blades and scraper edges honed between jobs, and it’s the kind of accessory that pays for itself the first time you skip a trip to buy replacement blades. For heavier grinding and engraving work that goes beyond what an oscillating tool can handle, the Worx WU716 die grinder brings a 550W brushless motor to metal finishing and detail grinding tasks.
A smart starter bundle: a basic blade kit covering wood, metal, and grout, a sanding pad set for corner work, and a rigid scraper blade for adhesive removal. That combination covers most of the tasks in this guide without overbuying. Browse the full lineup of garage tools and accessories at PriceLows™, where every qualifying order ships free and comes with 100% Shipping Protection built in.
Sources
These trade publications back up the technique and safety guidance throughout this article:
- How To Choose and Use Oscillating Multi-Tools - This Old House
- How to Use an Oscillating Tool - Family Handyman
- Oscillating tool — Wikipedia
- What is an Oscillating Multi-Tool? - Pro Tool Reviews
FAQ
Will an Oscillating Tool Cut a 2x4?
Yes, with a wood-cutting bi-metal blade, though it’s slow going compared to a circular saw. It’s the better choice for a partial or plunge cut into a 2x4 where a circular saw can’t get a clean start, but for a full crosscut, a saw will finish the job faster.
What Can an Oscillating Tool Cut Through?
It cuts wood, drywall, PVC pipe, sheet metal, embedded nails and screws, tile grout, and most adhesives when fitted with the matching blade. The blade, not the tool, determines what it can handle, so matching bi-metal, carbide-grit, or diamond blades to the material is what makes the difference.
What Are the Common Problems With Oscillating Tool Blades?
The most frequent issue is a worn carbide edge, which shows up as sparking or sudden slow cutting, a clear sign per Family Handyman that it’s time to replace the blade. Overheating from constant pressure without pauses is the second most common problem, especially when cutting plastic or metal.
Do I Need an Oscillating Tool?
If your projects involve tight corners, flush cuts, grout removal, or detail sanding, an oscillating tool solves problems a circular saw or orbital sander can’t reach. It’s not a replacement for your primary saw or sander, but as a detail and problem-solving tool, it earns its place in most home improvement toolboxes.