


How to Teach Kids to Paint: A Step-by-Step Guide
TL;DR:
- Teaching kids to paint emphasizes process over product by encouraging exploration, experimentation, and freedom to mess.
- Proper setup, age-appropriate techniques, and routines foster confidence, creativity, and habitual positive habits in young painters.
Teaching kids to paint works best when you lead with process over product, use age-appropriate materials, and build sessions around exploration rather than results. The children who stick with art long-term are rarely the ones who were pushed toward perfect pictures. They’re the ones who were given permission to make a mess, mix colors freely, and call a blob of blue whatever they wanted it to be.
Here’s the short version of what actually works:
- Focus on sensory exploration and mark-making rather than finished images
- Use non-toxic, washable paints and child-sized brushes suited to each age group
- Set up a dedicated, protected space before the paint comes out
- Keep sessions short, flexible, and low-pressure
- Praise effort and curiosity, never the final result
- Teach brush care and cleanup as part of the routine from day one
- Let kids choose their own colors, themes, and direction whenever possible
The sections below break each of these down into practical steps you can use at home or in a classroom, starting with setup and moving through technique, creativity, safety, and keeping kids motivated over time.
How to prepare and organize painting sessions for kids
A well-prepared space does more than protect your floors. It signals to kids that painting is a real, valued activity, and it removes the friction that makes adults dread the whole thing. Effective setup reduces stress for everyone and keeps sessions relaxed enough that kids actually want to come back.
Start with these setup basics:
- Choose the right materials. Non-toxic, washable paints and an inexpensive watercolor set, a brush set with varied sizes, and large-format watercolor paper are all you need for young children. Skip the professional-grade supplies.
- Protect the surface. Lay down newspaper, a plastic tablecloth, or a disposable drop cloth before anything else. Old shower curtain liners work well and can be wiped down and reused.
- Use aprons or old clothes. A dedicated “painting shirt” makes kids feel like real artists and removes the anxiety around staining good clothing.
- Pre-portion paints. Squeeze small amounts into a palette or muffin tin rather than handing over full tubes or bottles. This reduces waste and prevents the “I used all the red” problem mid-session.
- Keep cleaning supplies close. A bowl of water, a stack of paper towels, and a pack of wet wipes within arm’s reach means spills get handled in seconds instead of becoming a production.
- Match session length to attention span. Sessions of 10–20 minutes align with children’s natural focus and build sustained interest over time. You can always go longer if they’re locked in, but starting short prevents burnout.
- Build a routine. Same time, same setup, same cleanup sequence. Predictability reduces resistance and helps kids shift into creative mode faster.
Pro Tip: To keep acrylic paint from drying out between sessions, pre-portion small amounts into an egg carton, then seal the whole carton inside a zip-lock bag or plastic container. This can extend usability up to two weeks and cuts down on waste significantly.
For organizing brushes, palettes, and supply containers between sessions, a dedicated storage solution keeps everything accessible without the chaos. PriceLows™ carries affordable storage options that work well for corralling art supplies in a kitchen or craft area.
Teaching painting basics and techniques by age group
Not every child is ready for the same lesson. A three-year-old and a nine-year-old are in completely different developmental places, and trying to teach them the same technique produces frustration on both sides. Match the skill to the stage, and you’ll see kids actually progress.
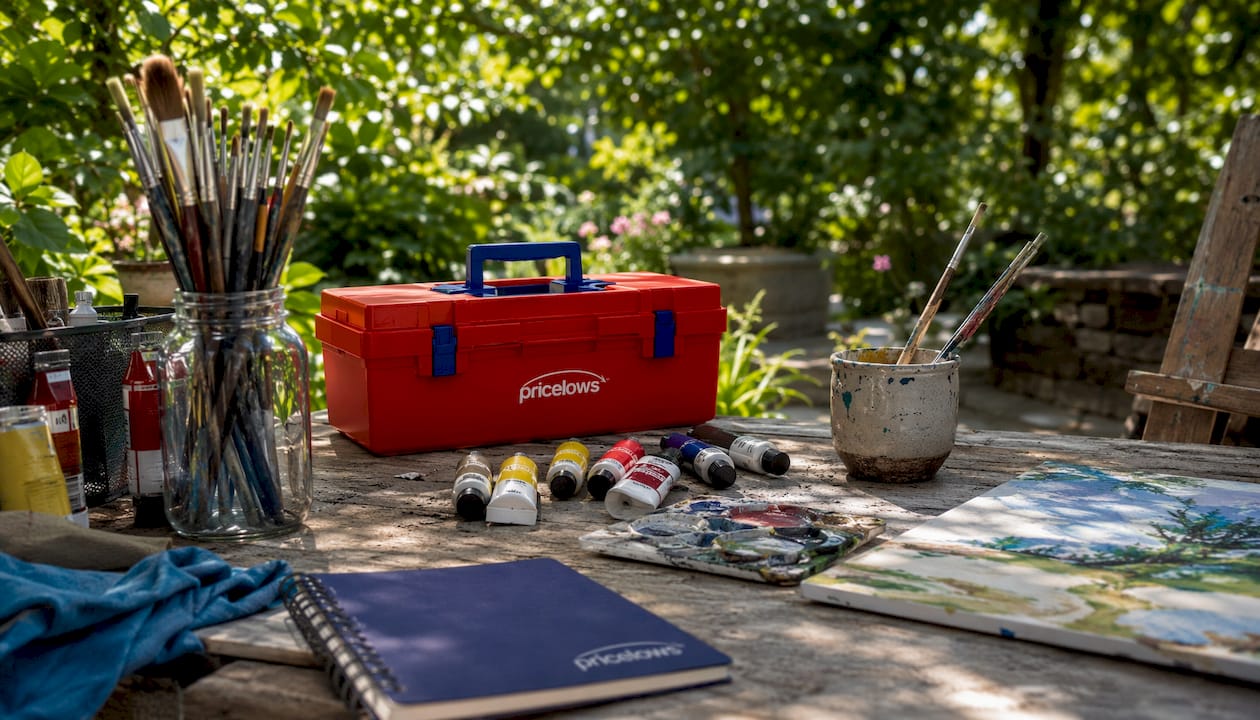
Toddlers (ages 2–3): Finger painting is the right entry point. No brush grip to worry about, no pressure to make something recognizable. The goal is sensory exploration: what does cold paint feel like? What happens when red meets yellow? Let them smear, press, and drag freely.
Preschoolers (ages 3–5): Introduce a chunky brush and teach a basic grip, the same way you’d hold a spoon. Simple strokes, dots, and swipes are the curriculum here. Exploring textures by pressing sponges, leaves, or bubble wrap into paint adds variety and keeps things interesting. Children learn best by experimenting freely and moving their arms for broad strokes before focusing on image accuracy, so give them room to move.
Early elementary (ages 6–8): Now you can introduce color mixing in a structured way. Show what happens when primary colors combine, then let them experiment on their own. Controlled brushstrokes, beginning shapes, and simple lines become part of the vocabulary. This is also the age to start talking about pressure: pressing hard versus barely touching the paper creates very different effects.
Older kids (ages 9–12): Blending, layering, and experimenting with different mediums like watercolor versus tempera versus acrylic become genuinely interesting at this stage. Introduce simple techniques like wet-on-wet watercolor or dry-brush texture. Step-by-step video tutorials work particularly well here because kids can pause, rewind, and follow at their own pace without needing an adult to repeat instructions.
Pro Tip: Assume kids know nothing about brush care and teach it explicitly from the first session. Show them how to hold the brush away from the ferrule (the metal part), rinse thoroughly between colors, and lay brushes flat to dry. A short video tutorial on brush care tends to stick better than a live demo because kids can watch it again.
One thing that cuts across every age group: encourage movement and mark-making before worrying about what the painting “looks like.” A child who has spent five minutes making wild, sweeping arcs across the paper is far more relaxed and open than one who was handed a reference image and told to copy it.
How to encourage creativity and artistic experimentation in kids
The fastest way to kill a child’s interest in painting is to correct their work. Not because kids are fragile, but because correction sends a clear message: there is a right answer, and you got it wrong. That’s the opposite of what art is for.
Shifting to a process-focused approach means avoiding corrections and comparisons entirely, and replacing them with curiosity. The “I See, I Notice, I Wonder” framework is one of the most practical tools available for this. Instead of saying “I love your house,” you say “I see a lot of orange in the middle. I notice the lines going in different directions. I wonder what’s happening there?” It keeps the child as the authority on their own work, and it never accidentally tells them they painted the wrong thing.
A few more approaches that actually work:
- Use open-ended prompts. “Paint how a thunderstorm feels” produces more interesting work than “paint a thunderstorm.” The feeling prompt invites interpretation; the subject prompt invites copying.
- Let them pick. Color choices, brush size, paper orientation, whether to paint big or small. Every decision a child makes about their own work builds creative confidence.
- Model mistakes. Paint alongside kids and narrate your own errors out loud: “Oh, I mixed too much water in there. Let me see what happens if I let it dry and paint over it.” Demonstrating mistakes and how to fix them normalizes error and shows that no painting is ruined, just evolving.
- Avoid comparisons. Never hold up one child’s work next to another’s, even as a positive example. It teaches kids to measure their worth against someone else’s output.
- Build self-validation. When a child asks “Do you like it?”, try turning it back: “What do you think of it? What’s your favorite part?” Then give your specific, genuine response. This teaches kids that their own opinion of their work is the one that carries the most weight.
Pro Tip: Set a routine that includes a moment of reflection after each session. Ask one question: “What was the most fun part?” Not “what did you make?” but what they enjoyed. Over time, this builds the habit of noticing and valuing their own creative experience, which is the foundation of long-term creative resilience.
Managing painting supplies and minimizing mess during sessions
Mess is not the enemy. Unmanaged mess is. Kids who paint in a space where spills are catastrophic learn to be timid with paint, which is exactly the opposite of what you want. The goal is a setup where mess is expected, contained, and easy to handle.
- Stick to washable, non-toxic paints. Tempera and washable watercolors clean up from skin, fabric, and most surfaces with water. Acrylic is harder to remove once dry, so save it for older kids who can work more deliberately.
- Cover everything before you start. Newspaper works, but a reusable plastic tablecloth is faster to clean and lasts longer. Cover the floor under the table too, not just the table surface.
- Dress for it. An old oversized shirt or a dedicated smock removes the clothing anxiety entirely. Kids paint more freely when they know their clothes don’t matter.
- Keep water bowls small. A small bowl of rinse water gets changed more often, which means cleaner colors and less muddy mixing. Two bowls, one for rinsing and one for clean water, is even better.
- Teach cleanup as part of the session. Cleanup is not the punishment at the end of painting. Frame it as the final step of the process, the same way a chef cleans their station. Kids who learn this early develop a sense of ownership over their workspace.
- Organize storage between sessions. Brushes stored bristle-up in a cup, paints grouped by color in a tray, paper in a flat folder. When supplies are easy to find and put away, kids are more likely to start sessions independently.
For a more permanent storage solution, a lockable rolling cabinet from PriceLows™ keeps paints, brushes, and paper organized and out of reach when unsupervised, which matters especially with younger children.
Teaching good painting habits and procedures
Good habits in painting are not about being neat. They’re about building a practice that kids can sustain independently over time. The routines you establish in the first few sessions tend to stick, so it’s worth being deliberate about them.
Start every session with the same sequence: lay out the protective covering, set up the palette, fill the water bowl, put on the apron. This pre-painting ritual takes two minutes and shifts kids mentally into “art mode.” It also teaches them that preparation is part of the creative process, not a chore before it.
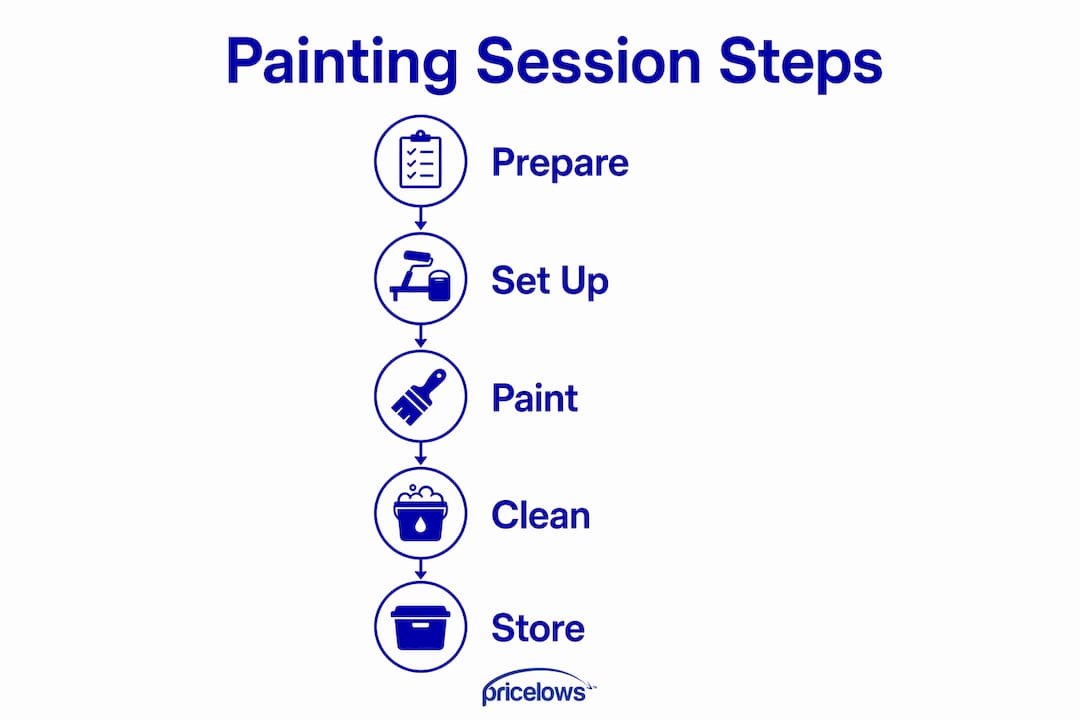
During the session, teach kids to rinse their brush before switching colors. It sounds obvious, but children who aren’t taught this will drag every color through every other color until everything turns brown. A simple rule: “rinse, then switch” is easy to remember and easy to enforce.
After painting, the sequence matters too. Rinse brushes thoroughly, reshape the bristles, and lay them flat or store them bristle-up. Seal paint containers. Wipe down the palette. Fold up the protective covering. Displaying the finished work, even just clipping it to a string with a clothespin, gives the session a satisfying conclusion and signals that the work has value.
Setting aside a consistent weekly time for painting, rather than treating it as an occasional activity, builds the habit faster. Kids who paint regularly develop technique naturally, without formal instruction, simply through repetition and experimentation.
Safety tips for using painting materials with children
Most commercial paints marketed for children are safe, but “safe” is not the same as “any paint.” A few specific guidelines keep painting sessions genuinely risk-free.
Always check for non-toxic labeling. Look for the AP (Approved Product) seal from the Art and Creative Materials Institute (ACMI) on any paint, marker, or art supply you buy for children. This certification means the product has been evaluated by a toxicologist and found safe for use by children.
Keep acrylic paints away from very young children. Acrylics are not water-soluble once dry, and some formulations contain additives that are not appropriate for toddlers who may put hands in mouths. Stick to washable tempera or watercolors for children under six.
Ventilate the space. Even non-toxic paints can have mild fumes in an enclosed room. Open a window or run a fan during sessions, especially with larger groups.
Wash hands before and after. Before, so kids don’t transfer food or dirt into the paint. After, to remove any paint residue before it dries on skin.
Store paints out of reach. Between sessions, keep all supplies in a closed cabinet or on a high shelf. A child who gets into unsupervised paint is a child who may ingest it, and even non-toxic does not mean safe to eat.
Check expiration dates. Old paint can grow mold, particularly watercolors stored in humid conditions. If a paint smells off or has visible growth, discard it.
Ways to motivate and build confidence in young painters
Confidence in art comes from repetition, autonomy, and the right kind of feedback. It does not come from being told every painting is a masterpiece. Kids are perceptive; they know when praise is empty.
Display their work. Clip finished paintings to a string across a wall, frame a few favorites, or dedicate a section of the refrigerator to rotating artwork. Seeing their work treated as worth displaying tells kids their creative output has real value.
Give them choices at every opportunity. Which colors do you want to use today? Do you want to paint big or small? Do you want music on? Autonomy builds investment. A child who chose the colors is more engaged with the painting than one who was handed a pre-set palette.
Guided lessons can take pressure off both the adult and the child. Step-by-step art tutorials, whether from a book or a video, let kids follow along at their own pace without needing an expert in the room. This is especially useful for parents who don’t consider themselves artistic. The lesson does the teaching; you do the encouraging.
Celebrate effort explicitly. “I noticed you tried three different ways to make that tree” is more useful than “great job.” Specific feedback on the process, not the product, teaches kids that trying hard and experimenting are the behaviors worth repeating.
How to assess and support progress in painting skills
Assessing a child’s painting progress is not about grading the work. It’s about noticing what they’re doing and responding in ways that push them forward without pressure.
Watch for what they attempt, not what they achieve. A child who tries to blend two colors, even if the result is muddy, is showing more growth than one who stays safely within a single color. Note the attempts. Encourage the experiments.
Keep a simple portfolio. Photograph or save paintings from each session and date them. Over a few months, the progression becomes visible, both to you and to the child. Showing a child their work from three months ago alongside today’s painting is one of the most motivating things you can do. They can see their own growth without you having to narrate it.
Ask questions that reveal thinking. “How did you decide to use that color there?” or “What would you do differently if you painted this again?” These questions tell you a lot about where a child is developmentally and what concepts they’re ready to explore next.
When a child hits a wall, whether it’s frustration with a technique or boredom with the same approach, introduce one new variable. A different brush size, a new color combination, or a different surface like canvas board or cardstock. One small change is usually enough to reignite interest without overwhelming them.
Creative painting project ideas that kids actually want to do
The best art projects for kids have just enough structure to provide direction and enough openness to allow genuine creative choices. Fully open-ended (“paint whatever you want”) can be paralyzing. Fully prescribed (“copy this exactly”) kills creativity. The sweet spot is a theme with room to move.
Texture paintings with salt: Paint a watercolor wash, then sprinkle table salt on the wet surface. The salt absorbs the pigment and creates a crystalline, starry effect. Kids are always surprised by this one, and the unpredictability is the point.
Leaf and nature prints: Brush paint onto a leaf, press it onto paper, and lift. The result is a detailed print of the leaf’s veins and structure. Works with flowers, bark, and textured fabric too.
Emotion paintings: Ask kids to paint how a feeling looks. Anger, excitement, calm. No figures, no objects, just color and line. This is a genuinely open prompt that produces wildly different results from different children.
Collaborative murals: Roll out a long sheet of butcher paper and let two or more kids paint together without assigned sections. Watching them negotiate space and color is as interesting as the finished piece.
Artist-inspired projects: Pick one artist per month and look at their work together before painting. Keith Haring’s bold figures, Yayoi Kusama’s dots, or Frida Kahlo’s self-portraits all offer clear visual languages that kids can borrow and remix in their own way.
Splatter and drip paintings: Thin paint with water, load a brush, and flick or drip it onto paper. Messy, fast, and deeply satisfying. This is a good session for days when energy is high and focus is low.
Seasonal landscapes: A blue sky, a horizon line, and whatever is outside right now. Simple enough for beginners, open enough for older kids to add detail and complexity. The constraint of “what you can see outside” is surprisingly generative.
Key Takeaways
Teaching kids to paint effectively means prioritizing process over product, matching techniques to developmental stages, and building consistent habits that make painting feel natural rather than stressful.
| Point | Details |
|---|---|
| Process beats product | Focus on sensory exploration and mark-making rather than finished images to build confidence and creativity. |
| Match technique to age | Toddlers need finger painting; older kids can handle blending, layering, and experimenting with different mediums. |
| Sessions of 10–20 minutes | Short, flexible sessions align with children’s natural attention spans and build sustained interest over time. |
| Teach brush care from day one | Rinsing, reshaping, and storing brushes properly protects tools and builds good habits that carry into every future session. |
| Autonomy drives motivation | Letting kids choose their own colors, themes, and approach builds investment and creative confidence faster than any structured lesson. |
Keep your art supplies organized with PriceLows™

A great painting session starts with a well-organized space, and keeping art supplies accessible, safe, and tidy between sessions makes the difference between a routine that sticks and one that fades. PriceLows™ carries durable, affordable storage solutions designed for exactly this kind of family project setup.
The rolling garage tool cabinet from PriceLows™ is a practical choice for families who want to keep paints, brushes, paper, and cleanup supplies in one lockable, mobile unit. Roll it out when it’s time to paint, lock it up when the session is done. Free shipping and a 100% shipping protection plan come standard on every order.